Edge Detection Example
The convolution operation is one of the fundamental building blocks of a convolutional neural network.
Using edge detection as the motivating example in this section, you will see how the convolution operation works.
In previous courses, I have talked about how the early layers of the neural network might detect edges and then the later layers might complete objects like people's faces.
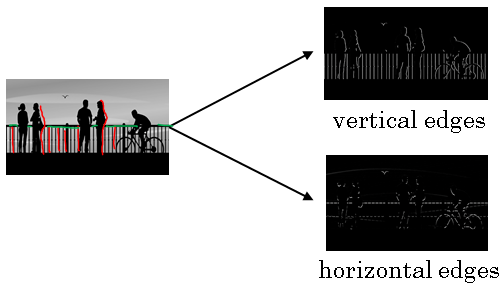
In this section, you see how you can detect edges in an image. Lets take an example. Given a picture like below for a computer to figure out what are the objects in this picture, the first thing you might do is maybe detect vertical edges in this image.
For example, this image has all those vertical lines, where the buildings are, as well as kind of vertical lines idea all lines of these pedestrians and so those get detected in this vertical edge detector output.
And you might also want to detect horizontal edges so for example, there is a very strong horizontal line where this railing is and that also gets detected.
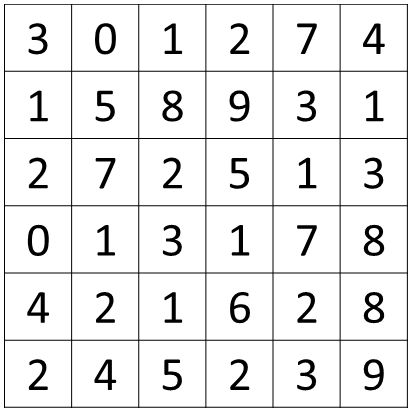
How do you detect edges in image like that in the previous example? Let us look with an example. Below is a 6 by 6 grayscale image and because this is a grayscale image, this is just a 6 by 6 by 1 matrix rather than 6 by 6 by 3 because they are on a separate RGB channels.
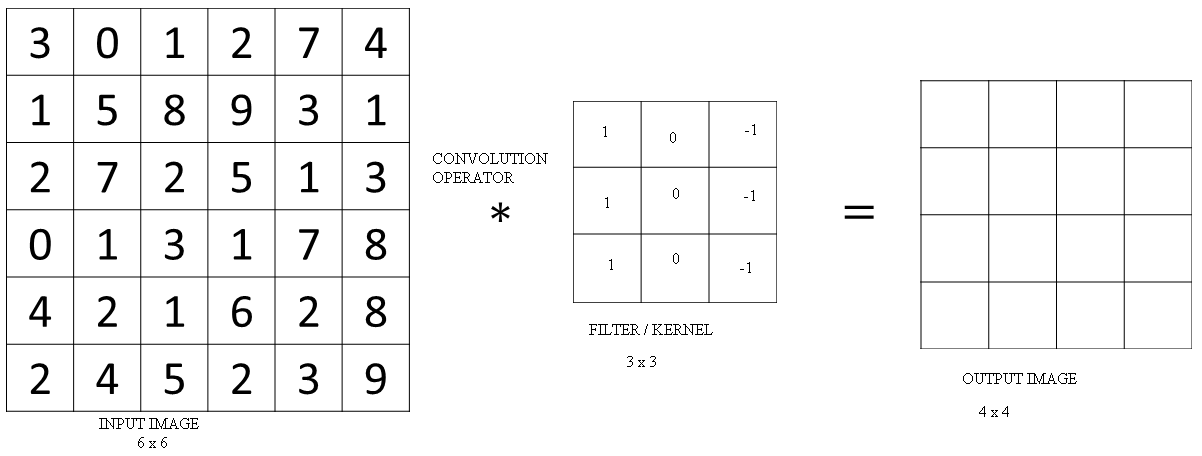
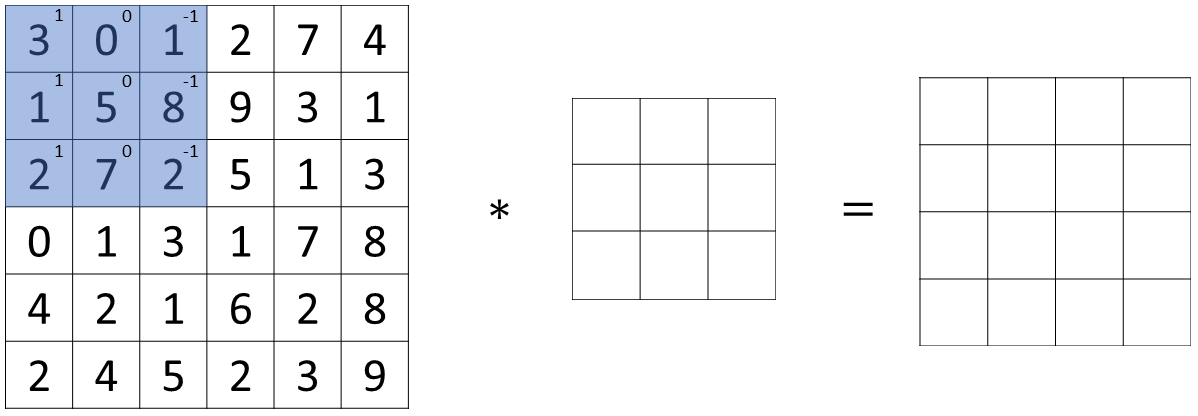
In order to detect edges or lets say vertical edges in this image, what you can do is construct a 3 by 3 matrix and in the terminology of convolutional neural networks, this is going to be called a filter.
And I am going to construct a 3 by 3 filter or 3 by 3 matrix that looks like the matrix below.
Sometimes research papers will call this a kernel instead of a filter but we are going to use the filter terminology in these section.
And what you are going to do is take the 6 by 6 image and convolve it (convolution operation is denoted by an asterisk "*") with the 3 by 3 filter.
One slightly unfortunate thing about the notation is that in mathematics, the asterisk is the standard symbol for convolution but in Python, this is also used to denote multiplication or maybe element wise multiplication.
The output of this convolution operator will be a 4 by 4 matrix which you can think of as a 4 by 4 image.
The way you compute this 4 by 4 output is as follows:
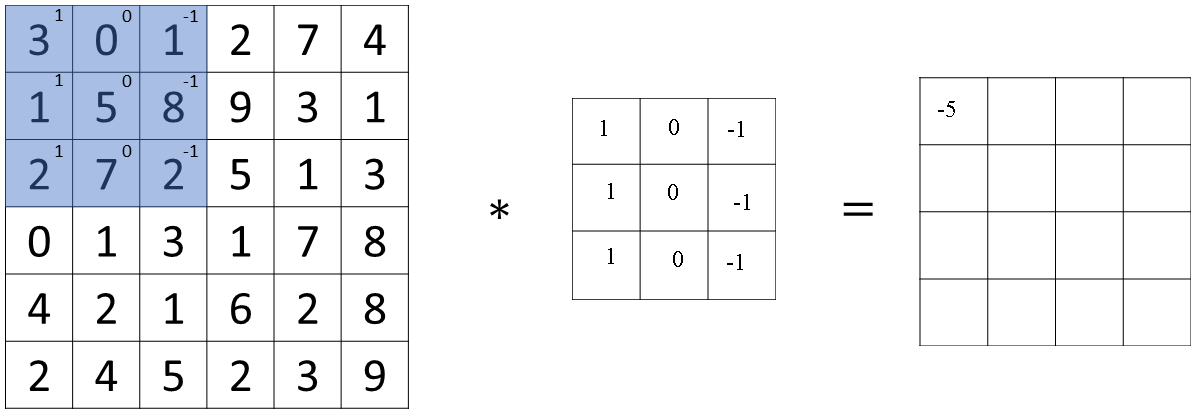
To compute the first elements, the upper left element of the 4 by 4 matrix, what you are going to do is take the 3 by 3 filter and paste it on top of the 3 by 3 region of your original input image.
And what you should do is take the element wise product so the first one would be \( (3 * 1) + (0 * 0 ) + (1 * -1) + (1 * 1) + (5 * 0) + (8 * -1) + (2 * 1) + (7 * 0) + (2 * -1) = 3 + 0 + -1 + 1 + 0 + -8 + 2 + 0 + -2 = -5 \) .
You can add up these nine numbers in any order of course. The result is put in the leftmost block of the final image.
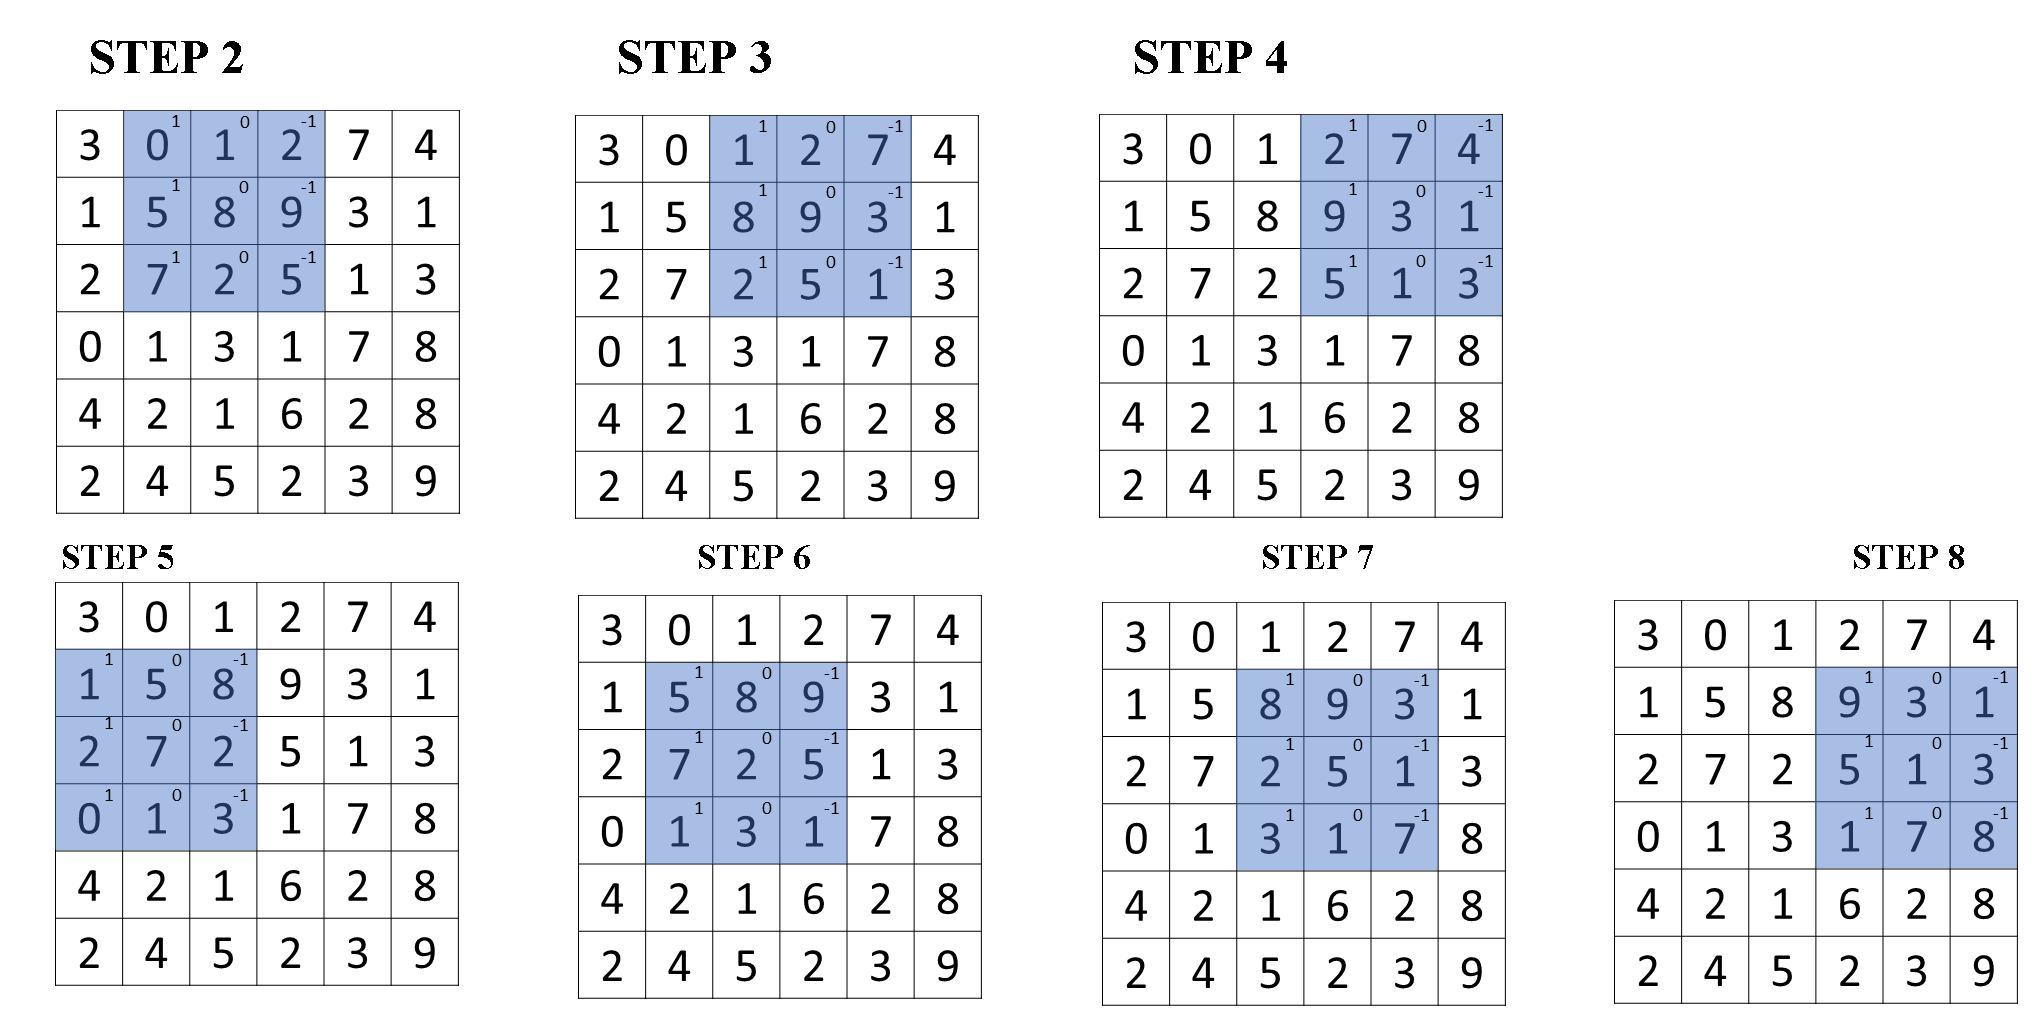
Next, to figure out what is this second element, you are going to take the blue square and shift it one step to the right.
You are going to do the same element wise product and then addition. This is to be repeated till all the parts of the image are covered. A few steps are shown below.
And this turns out to be a vertical edge detector, and you see why on the next part.


Why is this doing vertical edge detection?
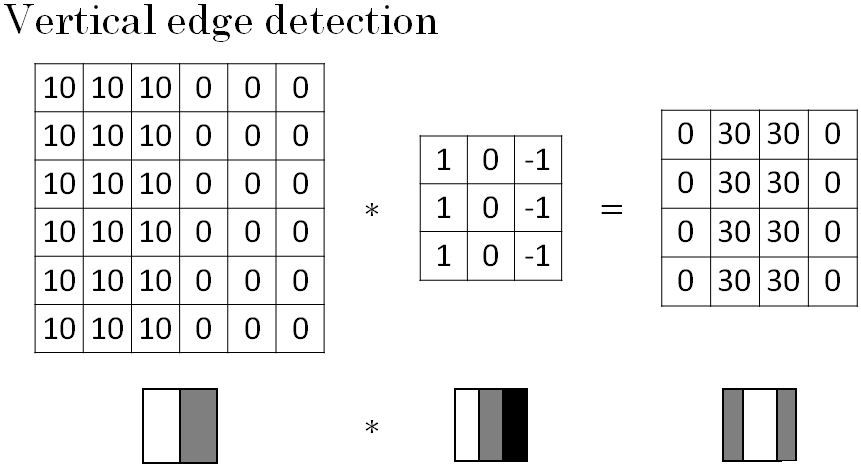
Lets look at another example. To illustrate this, we are going to use a simplified image. Below is a simple 6 by 6 image where the left half of the image is 10 and the right half is zero.
If you plot this as a picture, it will give you an image as shown below the matrix, where the left half, give you brighter pixel intensive values and the right half gives you darker pixel intensive values.
But in this image, there is clearly a very strong vertical edge right down the middle of this image as it transitions from white to black or white to darker color.
When you convolve this with the 3 by 3 filter and so this 3 by 3 filter can be visualized as follows, where is lighter, brighter pixels on the left and then this zeroes in the middle and then darker on the right.
What you get is this matrix on the right.
Now, if you plot this right most matrix's image it will look like an imae as shown in above figure. Where there is this lighter region right in the middle and that corresponds to this having detected this vertical edge down the middle of your 6 by 6 image.
If you are using, say a 1000 by 1000 image rather than a 6 by 6 image then you find that this does a pretty good job, really detecting the vertical edges in your image.
In this example, the bright region in the middle is just the output images way of saying that it looks like there is a strong vertical edge right down the middle of the image.
Maybe one intuition to take away from vertical edge detection is that a vertical edge is a three by three region since we are using a 3 by 3 filter where there are bright pixels on the left, you do not care that much what is in the middle and dark pixels on the right.
The middle in the 6 by 6 image given above is really where there could be bright pixels on the left and darker pixels on the right and that is why it thinks its a vertical edge over there.
The convolution operation gives you a convenient way to specify how to find these vertical edges in an image.
You have now seen how the convolution operator works. In the next section, you will see how to take this and use it as one of the basic building blocks of a Convolution Neural Network.
