Program: Use a pushbutton to control an LED
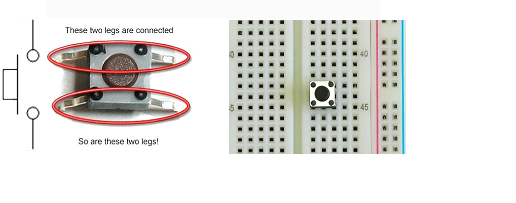
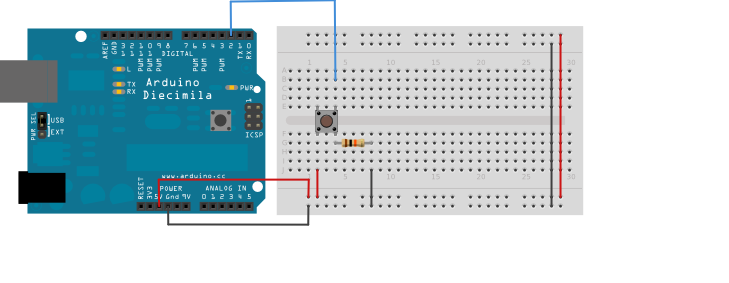
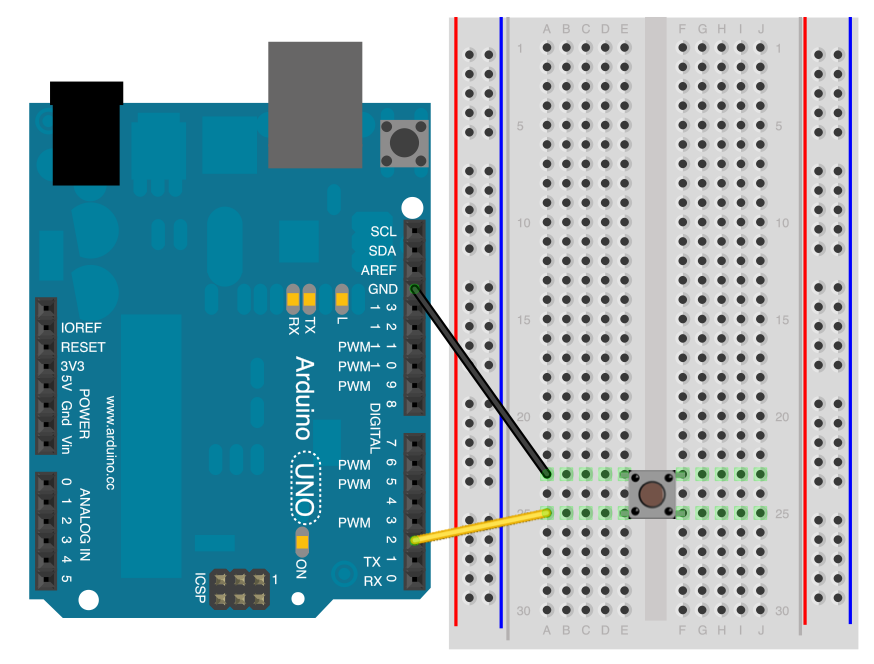
Step 1: Apparatus is arduino uno board, jumper wires (male to male), printer wire to connect board to PC and button. See image below
Step 2: After making connections as shown above. Type below program in Arduino Uno Desktop IDE and compile and upload it. You should see the output on the serial monitor.
const int buttonPin = 2;     // the number of the pushbutton pin
const int ledPin =  13;      // the number of the LED pin

// variables will change:
int buttonState = 0;         // variable for reading the pushbutton status

void setup() {
  // initialize the LED pin as an output:
  pinMode(ledPin, OUTPUT);
  // initialize the pushbutton pin as an input:
  pinMode(buttonPin, INPUT);
}

void loop() {
  // read the state of the pushbutton value:
  buttonState = digitalRead(buttonPin);

  // check if the pushbutton is pressed. If it is, the buttonState is HIGH:
  if (buttonState == HIGH) {
    // turn LED on:
    digitalWrite(ledPin, HIGH);
  } else {
    // turn LED off:
    digitalWrite(ledPin, LOW);
  }
}
Program: Demonstrates the use of INPUT_PULLUP with pinMode()
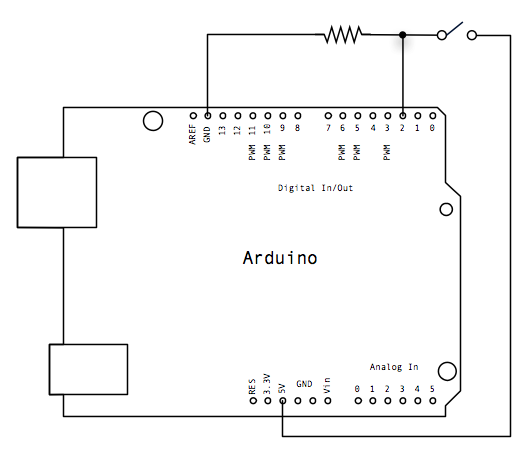
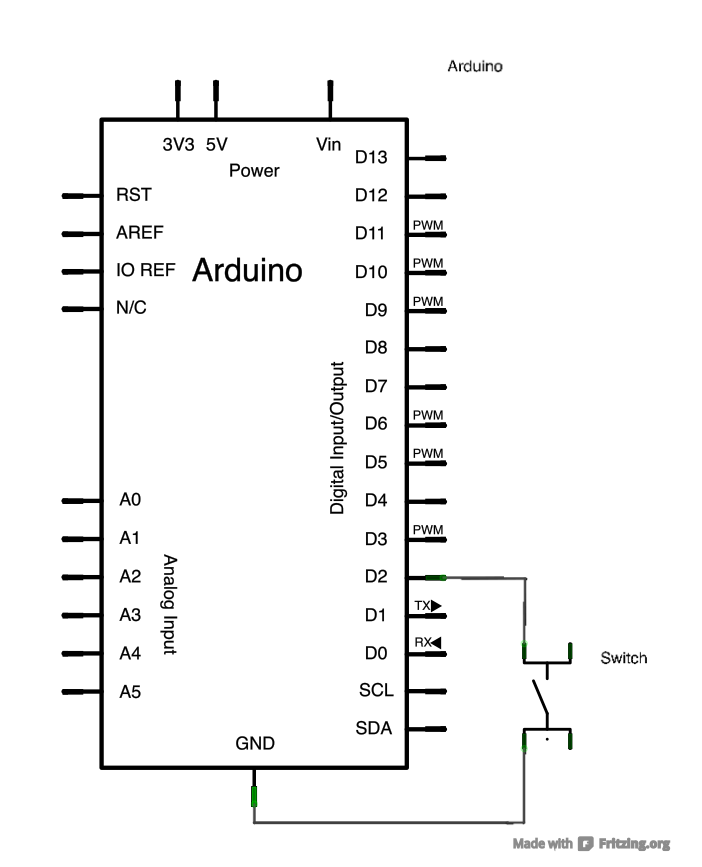
Step 1: Apparatus is arduino uno board, jumper wires (male to male), printer wire to connect board to PC and button. See image below
Step 2: After making connections as shown above. Type below program in Arduino Uno Desktop IDE and compile and upload it. You should see the output on the serial monitor.
void setup() {
  //start serial connection
  Serial.begin(9600);
  //configure pin 2 as an input and enable the internal pull-up resistor
  pinMode(2, INPUT_PULLUP);
  pinMode(13, OUTPUT);

}

void loop() {
  //read the pushbutton value into a variable
  int sensorVal = digitalRead(2);
  //print out the value of the pushbutton
  Serial.println(sensorVal);

  // Keep in mind the pull-up means the pushbutton's logic is inverted. It goes
  // HIGH when it's open, and LOW when it's pressed. Turn on pin 13 when the
  // button's pressed, and off when it's not:
  if (sensorVal == HIGH) {
    digitalWrite(13, LOW);
  } else {
    digitalWrite(13, HIGH);
  }
}